High-speed video recording
Author: MSc Anna Racino, Ph.D. Marcin Just, Ph.D. Michał Tyc (DiagNova Technologies)Date: 2021.05.01
Recording the video takes place in a separate window. During the examination, the recording window can be opened and closed multiple times (Fig. 1).
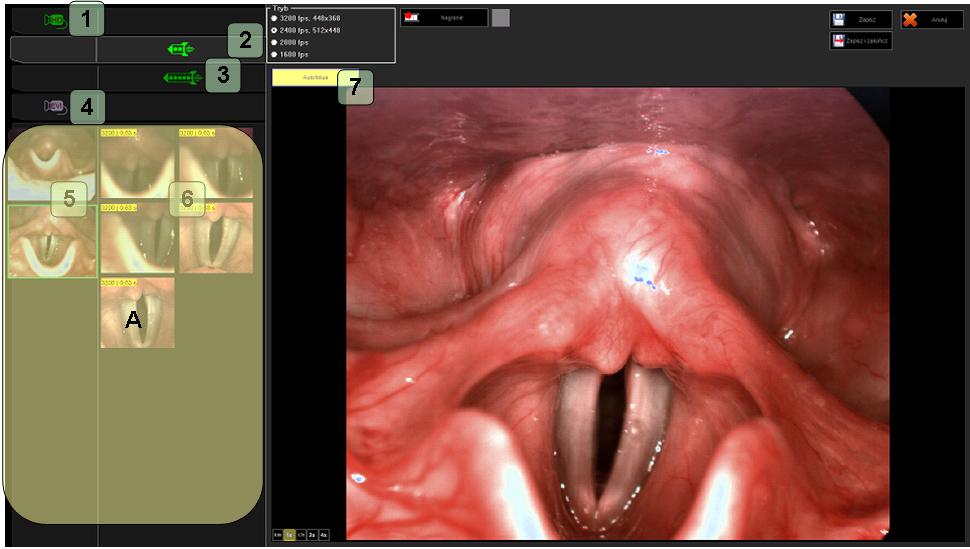
Fig. 1. High Speed recording window
The program allows to record in four modes: recording a video in HD resolution 1, recording a short film with a fast camera (200 frames) 2, recording a long film with a high-speed camera (2000 frames) 3, EVI recording with color light 4.
The recordings stored during one examination are visible on the left side of the recording window A. Normal speed video is saved on the left under the HD and EVI recording mode tabs 5. High Speed Videos recorded with a high-speed camera are saved under the appropriate HS recording tabs 6.
All high-speed recordings are described in the upper left corner by the recording speed − number of frames per second (fps) and the length of the recording.
HD video recording option (Fig. 2) allows you to record video of normal speed in high definition 1280 × 720 pixels. Natural view is recording with the use of white light from the illuminator
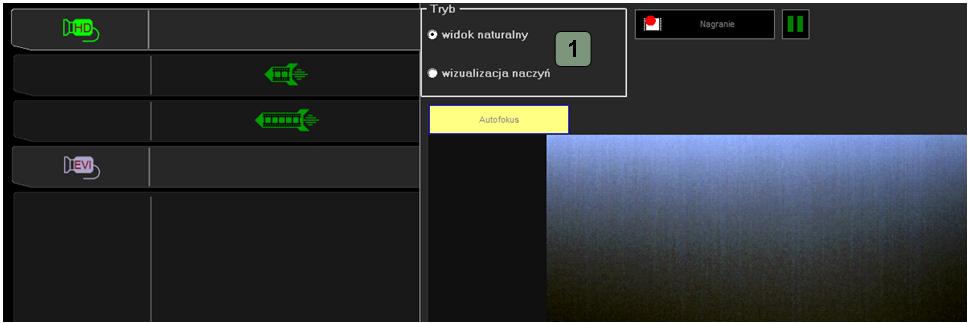
Fig. 2. Recording window – High Definition recording
Recording a short high speed sequence allows to record 0.08 seconds video (at 2400 fps) in which 200 frames are recorded. Recording a long high speed sequence allows to record 0.8 seconds video (at 2400 fps), in which 2000 frames will be recorded (Fig. 3). There are four high speed recording modes differentiated in terms of the number of recorded frames per second of the recording (fps) .
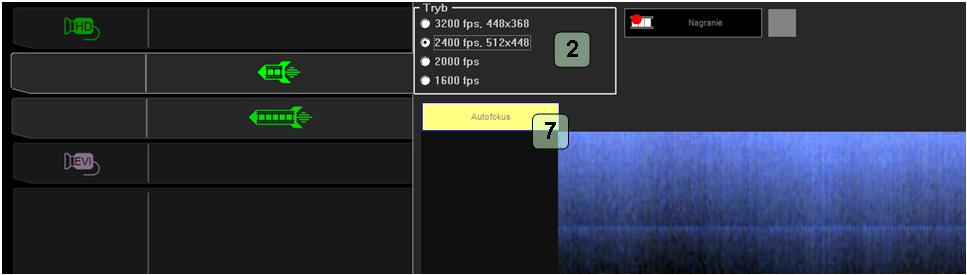
Fig. 3. Recording window - High Speed recording
The last option is to record EVI with the visualization of blood vessels using green and purple light provided by a dedicated illuminator
When the Autofocus 7 button is on, it allows program to automatically adjust the sharpness of the image during recording.
Recording is started by pressing the Record button or pressing the corresponding button on the foot switch. The foot switch has two pedals labeled Mode|Submode and Light|Rec (Fig. 4). The left Mode|Submode button allows you to switch through the recording options. The right button Light|Rec allows to turn on lighting and to start recording.
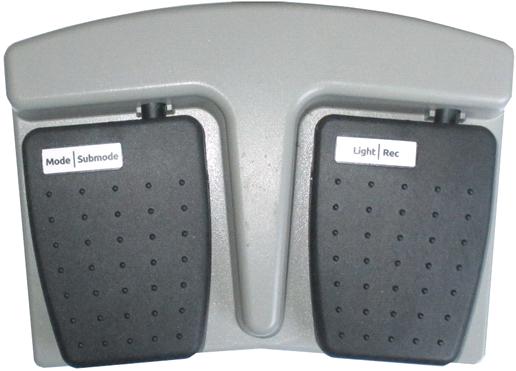
Fig. 4. Foot switch for high speed recording
In HD recording mode, the first press of the button starts the illuminator, the second press starts recording, the third press ends the recording. In the HSV recording mode, the first press of the button activates the illuminator, the second press records a high-speed video (recording usually lasts less than 1 second).
After recording, exit the window by clicking the Save button 12, in order to save the collected material. Clicking Cancel 13 will exit without saving recorded video sequences! If the Cancel button is selected after recording at least one video sequence, series of frames, or one frame, the closing window The data were not saved will appear with two options. If you want to stay in the recording window, select Return to recording. To confirm that you want to exit without saving the recorded sequence, select Exit anyway. After the recordings are saved, the first frames will appear in the examination window.
As in the standard video recording module, a video recording or images (frames) can be loaded from a file into the program using three buttons: Video from file, Image from file and the From session. In the HSV recording module, there is one more button − HSV files, which allows opening the Add HSV files window (Fig. 5). In this window, the user can select several recordings and images recorded with a high speed camera from any place on the disk, and also, for example, correct their color. The color correction control panel (Fig. 6) allows you to correct the image or completely change the color, for example to make the blood vessels visible.
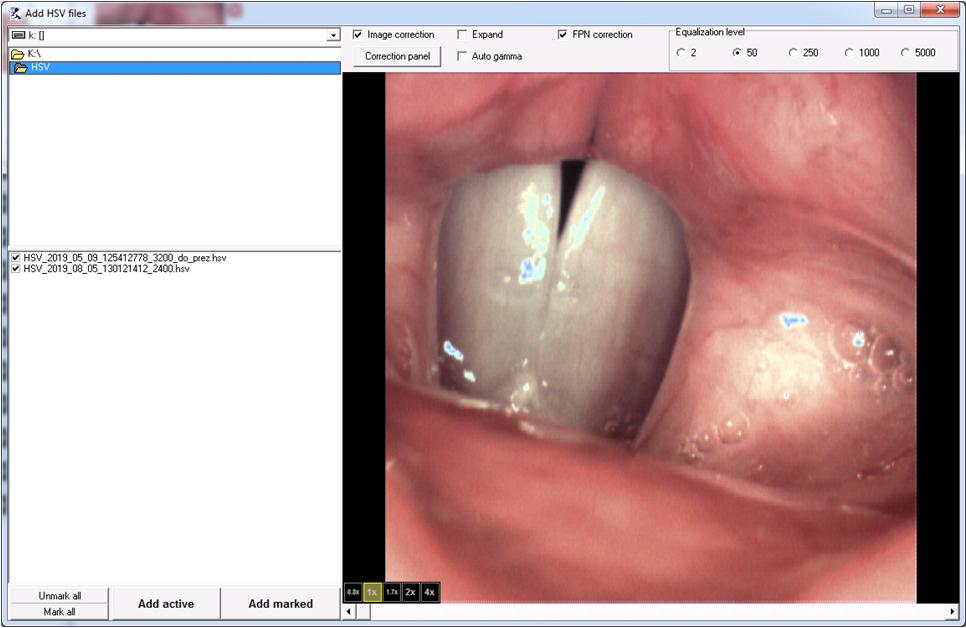
Fig. 5. Add HSV files window
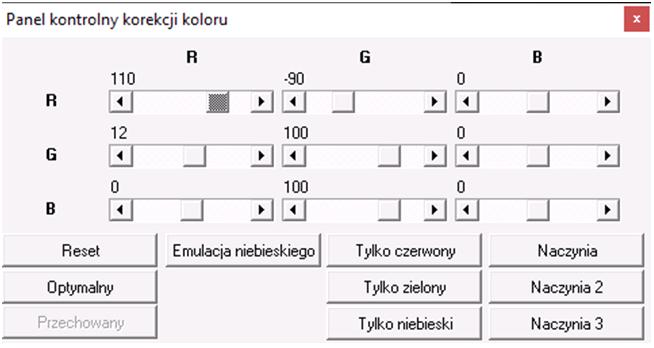
Fig. 6. Color correction control panel